User segmentation 101 – how to use filters in user research
It's not enough to draw general conclusions – not all your users are one and the same.
You'll never be able to please everyone, but that's alright. You can focus on meeting the needs of a specific group instead!
In this article we'll discuss:
- what exactly is user segmentation
- how can you segmentize your users with different filters
- how segmentation can help you with better user research
- how to use LiveSession for filtering various user groups
Sounds good? Let's begin!
What is user segmentation
User segmentation is a process of creating groups that differ in specific characteristics. Each segment has certain traits that distinguish it from other audiences.
For example, iPhone users, people who found the website on Google and visitors that clicked on a link in a Facebook group are three examples of various segments. There are different traits to consider, from browsers and devices to traffic sources and session durations.
What's more, the segment doesn't always consist of just one characteristic. Separate filters can be combined to create a very specific group. Let's say that you're researching the behavior of your London users when they're on the go. In this case, you might want to consider mobile sessions from a particular city. LiveSession’s filtering is quite detailed – and you can add custom filters, too! Have a look at an example:

Why user segmentation is important
Once you start segmenting your users, soon you'll realize that every group has very specific needs and problems. Mobile users deal with other issues than the ones who engage with your website on desktop. Different browsers, operating systems and devices may display your site in a different way. The list of possibilities is endless, so it makes no sense to try guessing – it makes sense to focus on proper research instead.
Segmentation in user research
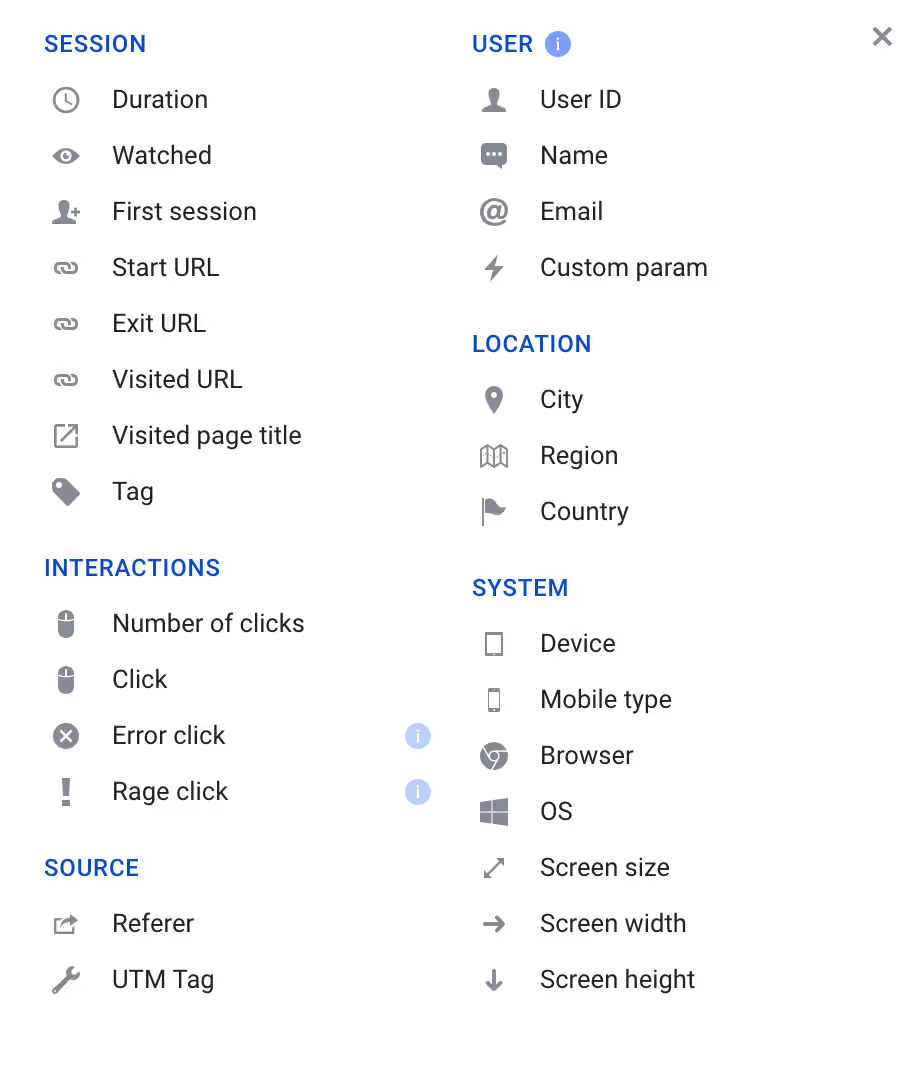
Your audience can be divided into separate groups at the very beginning of your UX workflow. LiveSession offers filtering tools to segmentize your user sessions according to a wide range of variable to choose from:
Behavioral segmentation
Let’s start from the basic – the way users interact with your website. When it comes to user behavior, you can filter your sessions based on:
Duration
Very short visits will help you find reasons for bounce rates. Longer ones are a valuable source of information about both the good and the bad things about your website. You can choose to see sessions longer than 30 seconds (or even milliseconds!), shorter than two minutes, as well as include or exclude specific durations. Here’s how the duration filter looks like within the app:

Watched
You don’t need to skip the sessions you’ve already seen manually. Instead, you can filter them out in just one click!
First session
With LiveSession you can scoop out the first-time visitors only. This way, you can see what's not exactly intuitive at first sight. And vice-versa – you can exclude first sessions from the search and focus on returning visitors only.
Start URL, Exit URL, Visited URL
These filters can be used to analyze user journeys that included a specific part of your website. You may focus on sessions that ended at the checkout, started at the home page or included the 'About us' section.
Here’s how the filter looks like:

Let’s start from discussing both drop-down lists in more detail. First of all, you can either apply the filters to:
- the whole URL
- specific parts of the URL – have a look at an example:

- Host – This is the name of the domain, for example livesession.io.
- Path – A specific part of the website, for example search, order or overview.
- Query parameter and query value – You can filter the URLs based on different parts on the query, too. These variables may look different depending on the structure of your URL.
When you use the has substring option, you’ll see sessions from pages that contain a specific query in the URL. For example, if you’re running a e-commerce store and would like to see how your users behave at the checkout, you need to enter a word that appears in your checkout’s URL. Likewise, if you’d like to filter product pages only, you need to enter a common substring for all of them, e.g. item, product or something similar.
You can also look at one specific URL only, or exclude it from the search:

Click
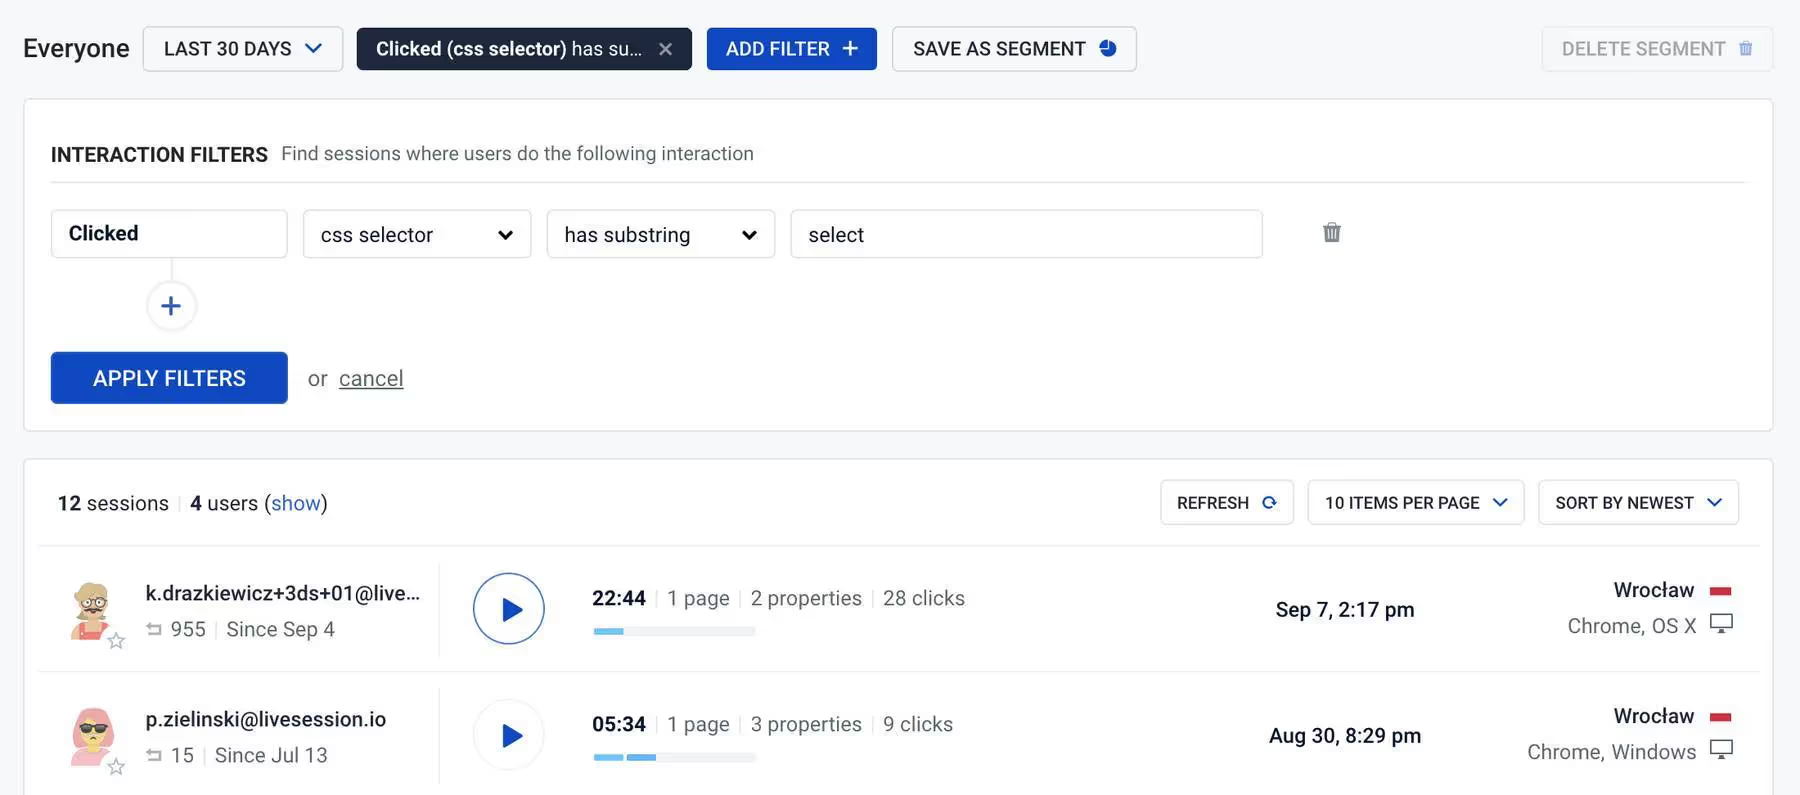
As a dedicated click-tracking software, LiveSession allows you to filter your clicks in many ways. First of all, you can browse user clicks based on either the CSS selector or text only.
If you’re not familiar with technical details, this may sound a little daunting at first. Don’t worry, though – it can be explained in just a few sentences.
Imagine you’ve got a button like this:

The developers usually use CSS (Cascading Style Sheets) to implement it on the website. In the CSS code, the button looks like this:
<button class="big green">Payment</button>
What can you do to find the sessions where the user clicked on that exact button?
With LiveSession, you can use the text or the CSS selector filter:
- Text – This filter is tracking the button text. In this case, it’s “Payment”.
- CSS selector – To find the button, you need to enter its CSS selector. Depending on the precision level, it might be 'button', 'button.big' lub'button.big.red'.
To see how it works, have a look at an example:
Number of clicks
With this filter, you can choose to see sessions where the users clicked or tapped something on the website. Filtering out sessions without clicks can be helpful if you'd like to focus only on the ones where the user has interacted with your website. This can be done by selecting a number of clicks greater than 0:

You might also choose an exact number or a larger/smaller amount. This will help you find sessions where your users were particularly active:

What’s more, there are two very special types of clicks you can track with LiveSession:
- Error clicks – This filter will display sessions where a click has triggered a JavaScript console error. In other words, you'll see sessions where it's clear that the user experienced a problem. Here’s how error clicks are presented in session replays:
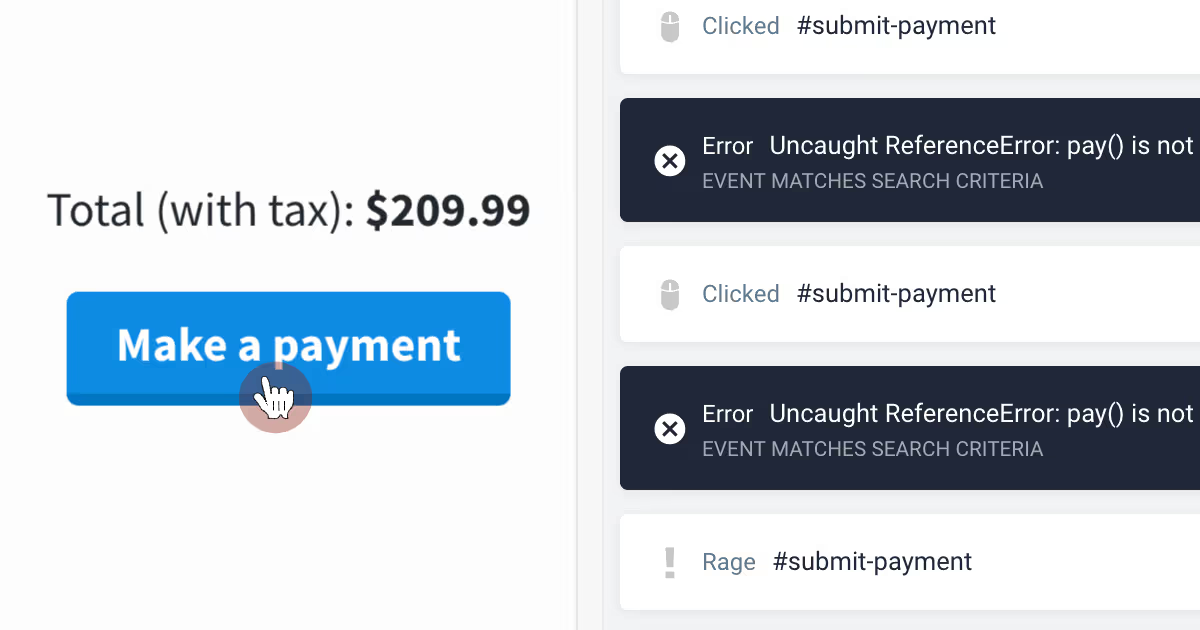
- Rage clicks – Used to research user frustration, the rage click filter detects people clicking multiple times at the same element. This might happen if a certain element, e.g. button or hyperlink, is not working.
You might be wondering now, what is the difference between error clicks and rage clicks? Both types of clicks often inform you about the same kind of event. Error clicks are recorded based on JavaScript errors, while a rage click is detected when someone clicks on the same element multiple times in a row.
Device-based and software-based segmentation
Using your website on a small smartphone while standing on the subway is a whole different experience than browsing it on a 20-inch desktop screen. With this in mind, here's how you can filter your user sessions depending on the device and software:
Device
Tablet, smartphone, desktop – what are you going to focus on? Every device has its own perks, so it's particularly important to filter this segment.
The filters in this category work in a similar way. Once you hover your mouse over the text box, you’ll see a list of the available options. Have a look at an example:

In this case, the visitors were using the website mainly on desktop. The available options depend on the behavior of your users. You’ll only see filters with at least one session assigned to them.
Mobile type
Why would you need such a specific metric? It might be that there’s an error on the newest iPhone model, while the same feature works perfectly fine for the older version. Here’s how this filter looks like in action:

Browser
Firefox, Safari, Google Chrome, Opera or maybe some niche browser? This information is sure to come in handy when trying to solve a bug. What’s more, you can also see if the visitor was using the mobile or the desktop version of a browser:

OS
OS X users may have a slightly different view of your website than visitors using Android or Windows. As you can see, this functionality covers both mobile and desktop operating systems:

Screen size, screen width, screen height
You might think that your web design is perfectly responsible. It doesn't hurt to double-check, though! This filter may help you find fields for improvement.
Hard to imagine how it works? Here’s an example:
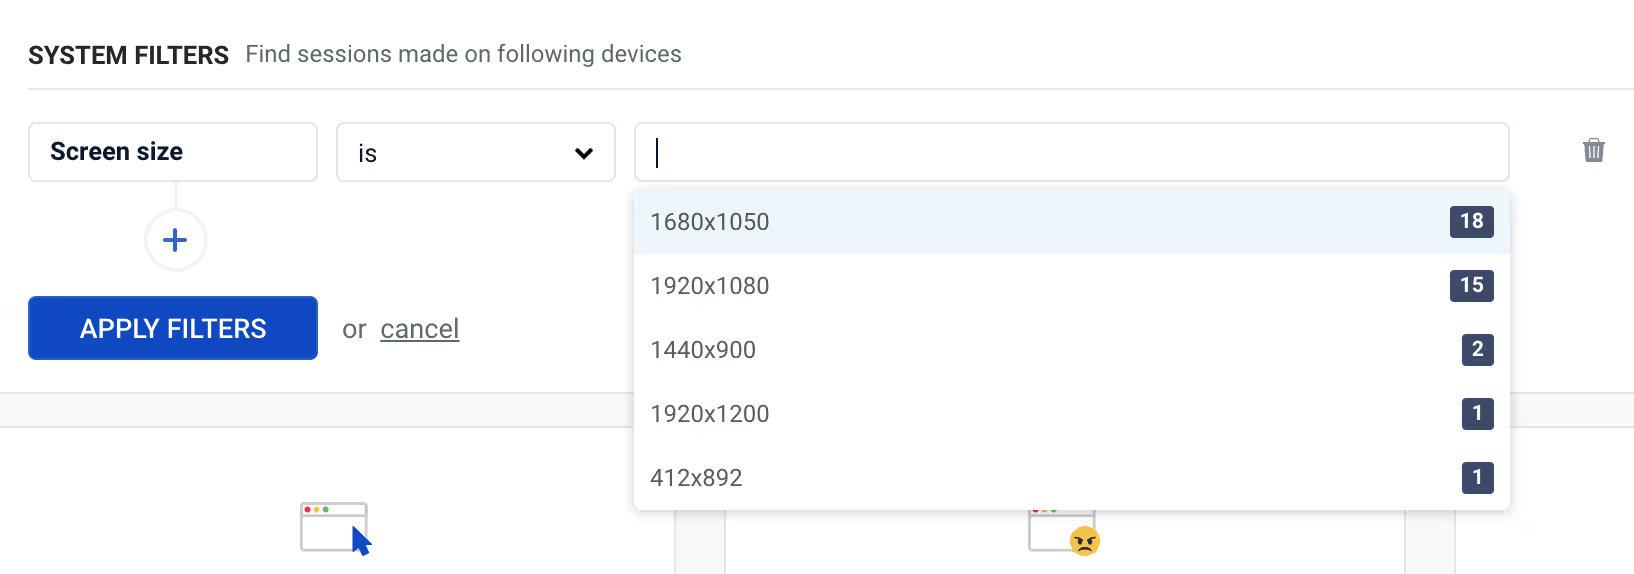
You can see what are the most common screen resolutions – in this case, 1680x1050 (16:10 ratio) and 1920x1080 (Full HD). This information is valuable for your designers, as it will help them optimize your product accordingly.
Source-based segmentation
Your users may behave differently depending on where they came from. There are two main ways to track this variable:
UTM tag
These are used to track traffic coming from a specific platform. For instance, if you advertise your company on Facebook and use UTM tags in your links, you'll be able to see how Facebook audience interacts with your website.
With LiveSession, you can browse user sessions according to UTM tags included in the links they have clicked:

Referrer
While UTM tags are designed with pay-per-click campaigns in mind, referrers work best when you know which domains will be linking to your website. In this case, you’ll see a list of websites your users came from. Have a look at an example:

Location-based segmentation
In many fields, especially e-commerce, the user behavior may vary significantly depending on the location. If you'd like to focus on specific market segments, you can filter your sessions by:
Country
Obviously, this is crucial if your business is operating internationally. The filter displays country codes, such as PL (Poland) or AE (United Arab Emirates), like in the example below:

Region
This filter is the most helpful for large markets. It's not enough to differentiate the US from other countries – your Florida users may have different habits than visitors from Illinois. In case of smaller countries, like Poland, you’re going to see separate voivodeships:

City
Yes, this is how detailed LiveSession filtering gets! You can even see the city your user comes from. It might be really helpful if you’re running a locally-focused campaign.

Identify your users
With LiveSession, you can see exactly who’s who. Here’s how:
User ID
Every visitor can be identified with their unique ID, which is assigned to each of their sessions. If you filter all recordings with that ID, you’ll see all the visits of this particular user.
Name, email
LiveSession allows you to add even more user data. You can identify your users by name and email, too. Visit ourhelp center to learn more – we’ve created a tutorial so you can add these properties in just a few clicks!

Custom parameters
Last but not least, you can integrate customer data from sales CRMs, customer service software and other tools. This way, it’s much easier to track of all the issues to solve and keep the whole team on the same page.
Need an example? If you’re selling a SaaS product, the users can be filtered according to the product plan they’ve purchased, like this:

Main takeaways
As you can see, there are many ways to segmentize your user sessions. Last but not least, remember that you can save particularly interesting filters as a pre-built segment:
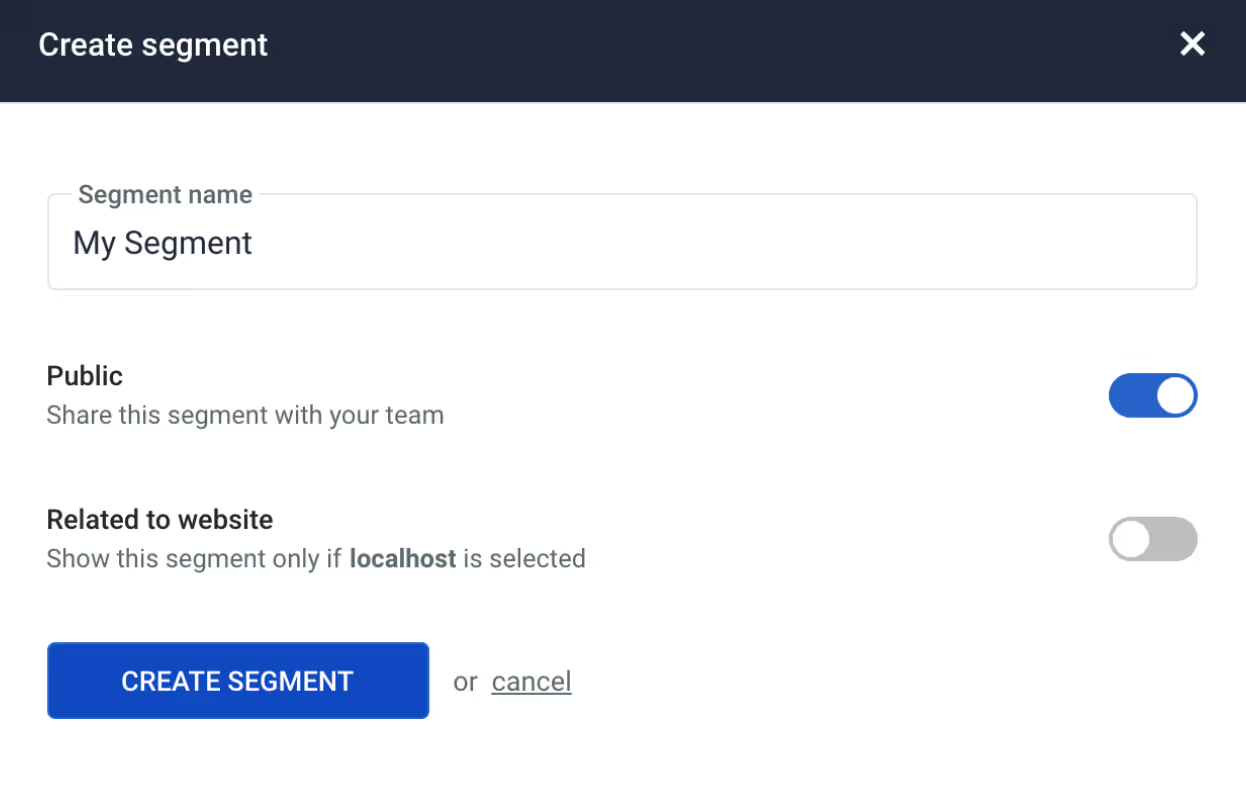
What’s more, the segments can be shared with your team or saved as your private categories. Here’s how it works:
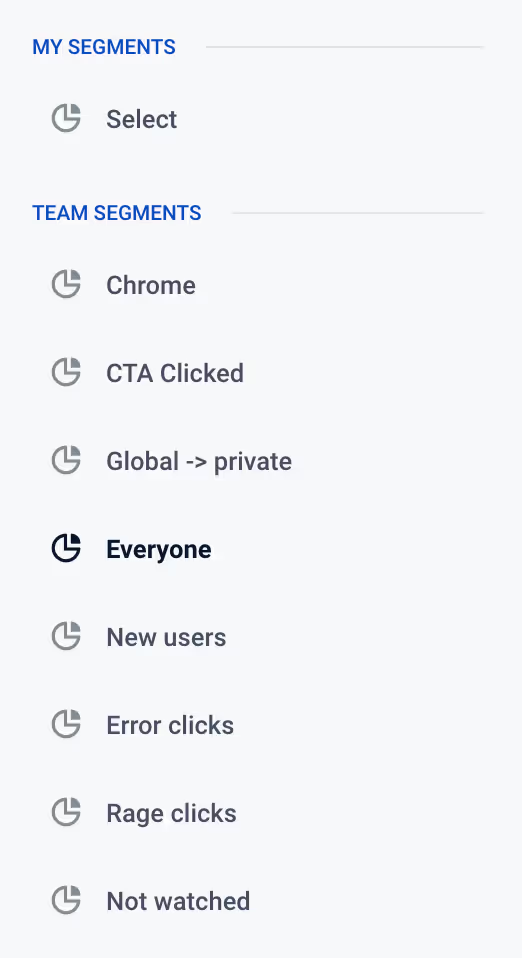
We encourage you to keep trying various approaches to see what you can discover. Happy tracking!
Related articles
Get Started for Free
Join thousands of product people, building products with a sleek combination of qualitative and quantitative data.


